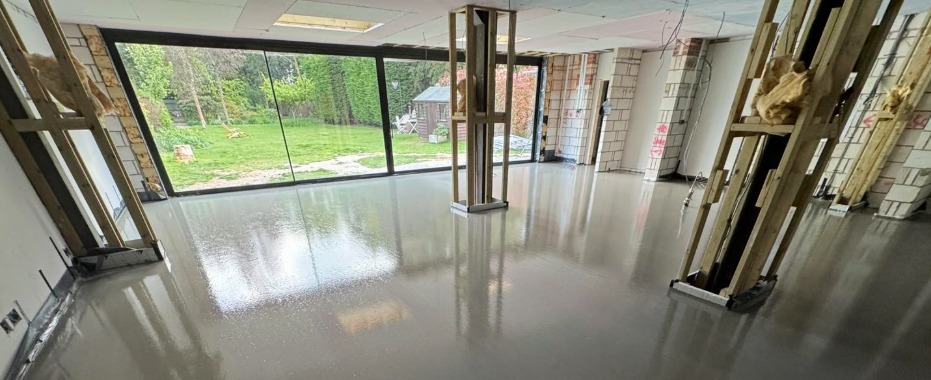
The Sloping Floor Reality – The Role Gravity Plays
The causes of sloping floors usually come down to 3 things; historic settlement in older properties, uneven beam-and-block installations, or garage conversions where the slab was deliberately cast with a fall toward the door. The Capital Screeding team regularly works on all 3, so in this blog we’re explaining how to screed a sloping floor.
You can’t treat a sloping subfloor like a standard screeding job. Free-flowing liquid screeds and self-levelling compounds obey gravity instantly; if you dump material at the top of a slope without the right prep, it will flow straight to the bottom, leaving bare the high point and blowing out your thresholds. Getting a dead-flat finish over a fall means calculating variable depths, preventing edge blowouts, and choosing a screed that won’t crack in the thinner section.
The Gravity Fix – How to Screed a Slope in 5 Steps
Here is the direct operational workflow for correcting a sloping floor:
The Quick Summary:
- Survey the Fall – Use a 360° laser to establish a high-point benchmark and map the room with adjustable levelling pins.
- Determine the Minimum Depth – Either raise the entire datum to reflect the screed’s minimum depth at the high point (typically 25mm for bonded cementitious liquid screed), or specify a deep-base polymer compound that feathers down to 0–3mm.
- Build Watertight Formwork – Screw down wooden battens across low-end doorways and seal the base with silicone to stop deep liquid screed escaping into adjoining rooms.
- Prep and Prime with SBR – Sand the slab, check relative humidity is under 75% RH, and apply a neat SBR bonding agent. Never use PVA.
- Pour Against the Pins – Pump or pour material sequentially into the deep zones first, working back to the high point to maintain control over the datum.
Step 1 – Survey the Fall and Establish Your Datum
Start by working out how much the slab drops.
Set up a 360° self-levelling laser in the centre of the room. Sweep the beam across the entire slab to find your highest point – this is your benchmark zero. From that mark, measure down to the concrete at 1-metre intervals across a grid. The difference between your benchmark and the lowest point gives you your total fall.
Once you’ve got the fall mapped, set up your pins:
- Drill-in Screws or Plastic Gauge Pins – Fix them into the concrete across your grid lines.
- Set Pin Heights – Adjust each pin head to the exact finished floor level (FFL) indicated by your laser beam.
- Visual Reference – During the pour, these pins will act as depth gauges. When the screed covers the head of the screw or pin, you are on datum.
Step 2 – Choose Your Screed
Standard cementitious liquid screeds cannot taper down to a razor edge. If you pour a standard cement-based liquid screed at 5mm, it doesn’t have the aggregate bulk to cure properly; it will crack, turn to powder, and debond under foot traffic.
There are 3 ways to tackle this, depending on your door thresholds and ceiling heights:

Method | Best For | Typical Thickness | How It Works |
Option 1 – Lift the Entire Datum (Cementitious Liquid Screed) | Medium-to-large domestic or commercial areas where door thresholds can be adjusted. | 25mm at high point; 50mm+ at low point. | Treat the highest spot as your minimum bonded depth (25mm for products like Cemfloor). The low point simply becomes thicker. Gives a single, monolithic, ultra-strong pour across the entire floor. |
Option 2 – Deep-Fill Polymer Compound (Single-Stage Feather) | Tight door frames, low ceilings, or smaller rooms (under 25m²) where you cannot lift the high-point datum. | 0mm–3mm at high point; up to 50mm at low point. | Fibre-reinforced self-smoothing screeds or deep-fill underlayments are designed to hold strength at variable depths. They can run from 50mm down to a true featheredge without cracking, but material costs are higher per square metre. |
Option 3 – Two-Stage Build-Up (Severe Falls) | Drops greater than 50mm–60mm (common in old basements or industrial ramps). | Base fill: 30mm–100mm. Capping screed: 15mm–25mm. | Bulk-fill the deep void with a stiff sand-and-cement mix or aggregate-loaded screed to bring the slope within a manageable 10mm–15mm range. Allow it to cure, prime the base, then cap with a flowing compound. |
Step 3 – Calculating Material Don’t Order Flat M³
Because you are screeding a wedge rather than a uniform slab, standard floor area calculators will give you the wrong figures. Don’t depend on them; if you order too little, the screed will cure with an unfinished edge halfway across the room
Calculating Screed Volume for a Sloping Floor
To find the exact volume for a fall, calculate the average depth across the slab:
The Formula:
Volume (m³) = Length (m) × Width (m) × [(Minimum Depth + Maximum Depth) ÷ 2]
Worked Example:
A room measuring 6m × 4m (24m² area) has a high point requiring 25mm (0.025m) of screed and falls to 55mm (0.055m) at the lowest point.
- Average Depth: (0.025m + 0.055m) ÷ 2 = 0.04m (40mm)
- Base Volume: 24m² × 0.04m = 0.96m³
The Site Rule: Always add 10% for subfloor deflection and waste.
Total order: 0.96m³ × 1.10 = 1.06m³
Step 4 – Subfloor Prep and Low-End Containment
Liquid and semi-dry screeds will only bond as well as the concrete underneath them allows. If there’s dust, oil, plaster droppings, or weak surface laitance, the screed will lift as it cures under tension.
Cleaning and Moisture Checks
Sand and vacuum the slab back to solid aggregate. Carry out a screed moisture test using a calibrated hygrometer box. Under BS 8203 / BS 8204 standards, if the slab reads above 75% Relative Humidity (RH), you must apply a liquid damp-proof membrane (DPM) before continuing.
Priming – SBR vs PVA
Apply a neat SBR (Styrene-Butadiene Rubber) bonding agent or an acrylic primer worked directly into the porous concrete with a stiff broom.
Never use PVA – PVA is water-soluble. The wet water in your fresh screed will re-emulsify the PVA, creating a slippery, gelatinous barrier that guarantees the screed will de-bond.
Shuttering the Low Side
Because the material is deepest at the bottom of the slope, it exerts noticeable pressure against walls and openings.
- Fix 8mm–10mm polyethylene expansion foam around the entire perimeter to absorb drying shrinkage.
- Across doors, drains, or room transitions at the deep end, fix a sturdy timber stop-end baton.
- Run a bead of silicone along the floor line and bed the timber firmly down to seal the gap. If there is a 2mm gap beneath your shuttering, liquid screed will find it and pool in the next door room.
Step 5 – Placement: Pouring Against the Pins
When the site is prepped and the screed is mixed, the placement sequence needs your detailed attention. Don’t pour from the high point downhill. Pouring from the top allows the heavy head of material to gush downward, washing out your primers and leaving the high point bare.
Fill the Deepest Area First – Pump or pour directly into the lowest third of the room. Bring that section up until the material touches the base of your gauge pins.
Work Toward the Benchmark – Blend subsequent batches back toward the shallower end, maintaining a continuous wet edge. This lets the material settle naturally without running away from the top edge.
De-Aerate and Consolidate –
For flowing cementitious screeds, pass a dappling bar lightly across the surface in two directions. The first pass consolidates the material; the second light pass breaks the surface tension and flattens out minor ridges.
For hand-mixed polymer compounds, use a spiked roller immediately after spreading. This releases trapped air bubbles that cause pinholes and helps feather the high edge cleanly into the substrate.
Curing – Keep windows and exterior doors shut for the first 24 to 48 hours to prevent draughts from skinning the surface prematurely, as this is what causes edge curling.
When to Bring in the Pump and Crew
For a single doorway or an en-suite with an 8mm drop, a couple of bags of polymer deep-base compound and a mixing paddle will get the job done over a weekend.
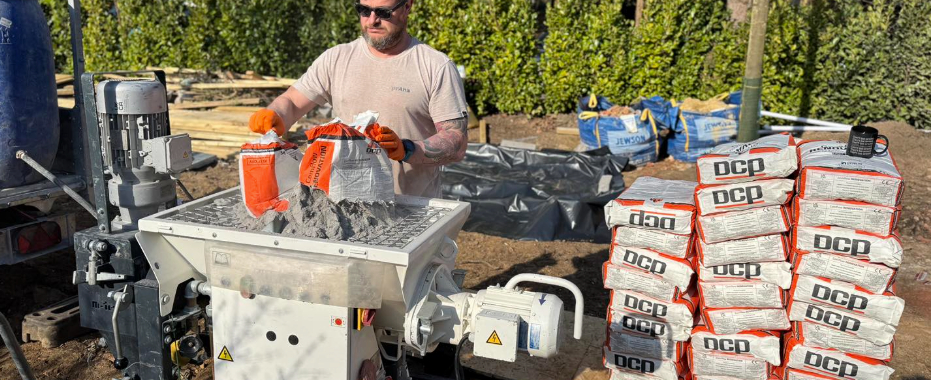
If you’re looking at a fall across an entire ground floor, a garage conversion, or an area exceeding 30m², we wouldn’t recommend mixing by hand. Cementitious liquid screeds set fast; if batch two is mixed ten minutes after batch one, you’ll get cold joints, visible tidemarks, and a floor that fails surface regularity checks.
For larger falls, bring in an experienced team of screeders; your floor will be completed fast, pinned precisely to your laser benchmark, and ready for light foot traffic within 24 to 48 hours.
Need a sloping slab brought to a dead-flat finish with no stress? Contact Capital Screeding today for a free quote. We’ll set your datum, calculate your exact mix, and pump your floor fast and efficiently – 020 3369 3396