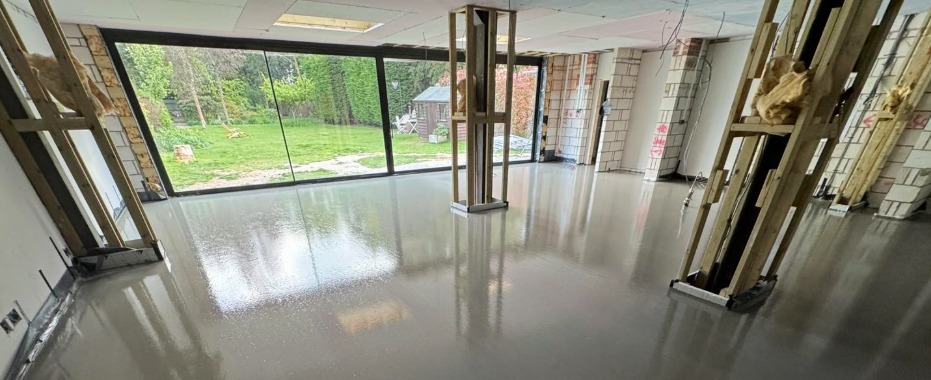
Achieving a Flawless Floor Finish on Liquid Screed
One of the best things about working with liquid screed is its versatility with regard final floor finishes. Whether you’re looking to lay tiles, hardwood, or vinyl, you’re covered. But if you want a high-quality, professional finish that stands the test of time, you need to be aware of the preparation the screed surface requires. It’s a detailed process, and necessary for a perfect bond.
In ‘Liquid Screed – a guide to compatible floor finishes’ we’ll provide a step-by-step outline of the prep so you can be guaranteed a perfect floor finish.
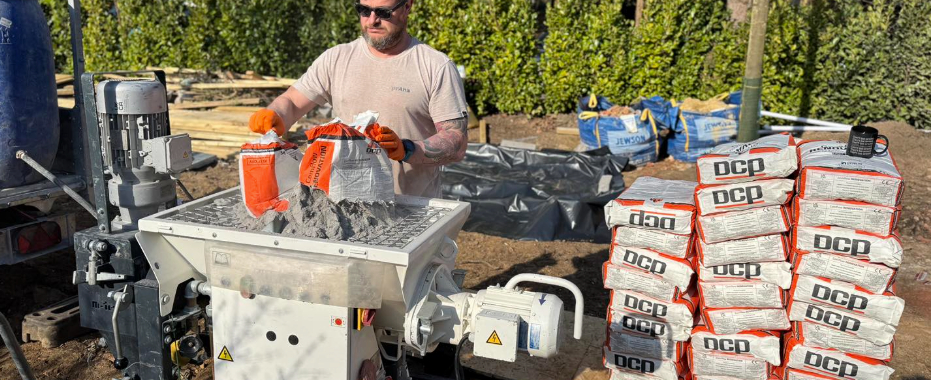
Why trust our advice? As a leading supplier and installer of liquid screed for London, Essex and the South East, the Capital Screeding team has had plenty of experience with floor finishes. Our knowledge comes from real-world jobs, not just product manuals. We believe in providing the right information to ensure your flooring is a success from the subfloor up.
Approved Floor Coverings for Liquid Screed – A Screeder’s Guide
From our experience of working with liquid screed, a successful floor finish is all about understanding the interaction between the covering and the screed substrate. While most finishes are compatible, they each have specific installation requirements that you need to know about.
Compatible Finishes List:
Tiles & Natural Stone – The screed’s dimensional stability is a major benefit here. Pro-Tip – A cement-based, S1-grade flexible tile adhesive is standard practice. For large format tiles or natural stone, we recommend priming the screed with a suitable acrylic primer to control suction and improve the bond.
LVT, Sheet Vinyl & Linoleum – The flatness of liquid screed is a good start, but these particular floorings require an SR1 finish. Pro-Tip – Plan for a 2-3mm layer of a latex or water-based smoothing compound to be applied after laitance removal and priming. This is required practice for a professional-looking job.
Engineered & Solid Hardwood – Performance relies entirely on moisture control. Pro-Tip – The screed must be commissioned if underfloor heating is installed, and moisture readings need to have been taken and recorded. Use a liquid DPM (Damp Proof Membrane) before laying any wood, even if the readings are good. It’s an excellent insurance policy.
Laminate Flooring – A floating floor system that is straightforward to install on liquid screed. Pro-Tip – Pay attention to the underlay. Don’t use a cheap, basic foam. Invest in a quality underlay with an integrated vapour barrier to prevent any residual moisture from affecting the laminate core over time.
Carpet & Grippers – Standard practice, but with a UFH caveat. Pro-Tip – You need to be aware of the risk of puncturing a heating pipe with gripper nails. The safest method is to use a high-grab adhesive like Gripfill or a similar cartridge-based product to stick the grippers to the screed.
Epoxy Resin & Microcement – This is a specialist application for a high-end finish. Pro-Tip – These systems rely on a mechanical bond, meaning the resin needs to grip the screed physically, almost like Velcro. A smooth screed surface offers no grip, so the floor needs to be “profiled” using a heavy-duty floor grinder.
The Necessary Steps for Preparing Your Liquid Screed
A perfect floor finish is only possible with careful preparation. It’s the most important stage of the entire process, and cutting corners here will always show in the final result. The following checklist is what we use to ensure the screed is primed and ready for any floor covering.
Step 1 – Make Sure the Screed is Fully Dry
Liquid screed needs to be both cured (hard) and dry (low moisture content). Normally you can walk on it after 24-48 hours, but it must be protected from heavy usage and left to dry for 1 day per mm of thickness up to 40mm.
Before laying any flooring, the moisture content should be tested with a digital hygrometer to make it meets the flooring manufacturer’s requirements (usually below 75% RH).
Step 2 - Remove the Laitance
As the screed cures, a weak, chalky layer called ‘laitance‘ forms on the surface. This layer is too weak to bond with adhesives and must be removed. This should be done 7-10 days after the screed is poured. Use a rotary floor sander with a suitable abrasive attachment to sand the entire surface until the cream-coloured laitance is gone.

Step 3: Vacuum Thoroughly
The sanding creates a lot of fine dust, which is a barrier to a good bond. Don’t just sweep it. Use a powerful industrial vacuum cleaner to remove every last bit of dust from the surface. The floor should be completely clean and pristine before you think of applying your primer.
Step 4 - Apply a Suitable Primer
Liquid screed is dense but absorbent. Your primer seals the surface, stopping the moisture from your tile adhesive or levelling compound from being sucked into the screed too quickly. This ensures the adhesive cures properly and forms a strong and durable bond. Always use an acrylic primer recommended for use with anhydrite (gypsum-based) screeds. Apply it evenly with a roller and allow it to dry completely.
Frequently Asked Questions About Liquid Screed
To give you confidence when laying your flooring, here are our answers to a few more regular questions we get asked by builders and renovators across London.
Commissioning is about gently introducing heat into the screed, which helps it to dry out fully and relieve any stress. You should wait at least 7 days after the screed is poured. Start by circulating water at a low temperature (around 20-25°C) for three days, then gradually increase the temperature by 5°C per day until you reach the maximum working temperature. Maintain this for a few days before cooling it down gradually.
For a “bonded” application (directly onto a concrete subfloor), the minimum is typically 25mm. For an “unbonded” application (over a membrane or insulation), it’s usually 35mm. When used over underfloor heating pipes, you must have a minimum of 25mm cover over the pipes themselves.
Minor hairline cracks or crazing are usual superficial. They can occur as a result of rapid drying at the surface. As long as the screed is still solid and not breaking up, these can be filled and stabilised with a liquid epoxy resin repair product before you lay the final floor finish.
Liquid screed is gypsum-based (anhydrite), while most standard tile adhesives are cement-based. When these two materials come into direct contact in the presence of moisture, a chemical reaction can occur, forming a crystal called ‘Ettringite’. This creates a brittle, weak layer between the screed and the adhesive, causing tiles to lift and fail. The acrylic primer acts as a barrier, stopping this reaction.
Get Your Project Started on the Perfect Foundation
Getting the subfloor right is the most important part of any flooring project. Understanding how to correctly prepare your liquid screed is central to its success and prevents disappointment further down the line. If you want to take the guesswork out of the job, Capital Screeding can manage the process for you, delivering a perfectly prepared floor ready for your chosen finish.
Make certain your project is a success from the ground up. Get in touch with Capital Screeding for expert advice and a no obligation, detailed installation quote – 020 3369 3396