Choosing Liquid Screed vs. Traditional Sand and Cement for Your Next Project
When you’re planning a renovation every choice you make has a potential impact on your schedule and your budget. The ‘wet screed vs. dry screed’ dilemma means choosing between traditional sand and cement and modern liquid screed. Which is best for your project?
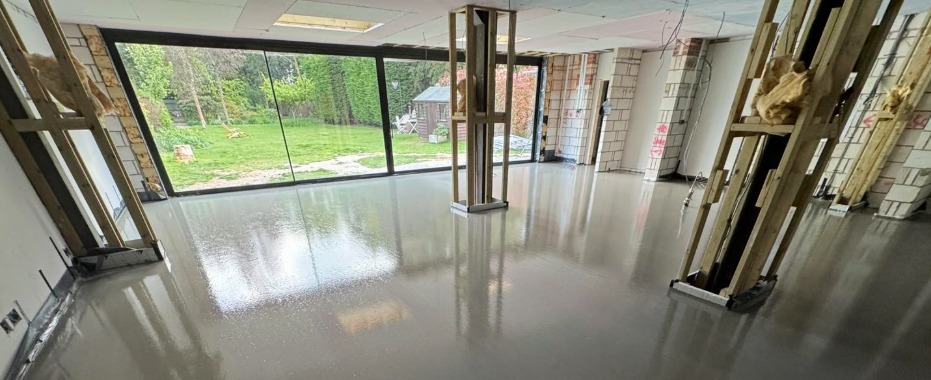
Traditional dry screed is the old-school favourite for small patches or steep gradients, while liquid screed – often called wet or flow screed – is the industry standard for larger extensions and underfloor heating. Why? Because liquid screed flows into every available gap, guaranteeing a perfectly level finish and excellent thermal performance.
At Capital Screeding, we bring years of London-based expertise to your site. Beyond pouring your floor, we make absolutely sure that your substrate is perfectly prepared for a flawless finish. In this blog we look at the jobs that are perfect for dry screed, and those which absolutely need wet screed to achieve success.
Wet vs. Dry – Which One Works for Your Job?
The “best” screed will always depend on your project’s goals. Dry screed is a ‘low-tech’ but reliable solution. We would recommend it for smaller, localised jobs or wet room areas where we need to create a physical slope for drainage. It’s cost-effective for small patches, but it’s labour-intensive and slow to dry, which can often create a bottleneck in your project.
If you are looking for a flawless, flat finish across a large area, liquid screed is the one to choose. The technology allows us to pump up to 2,000m² in a single day. Beyond the speed, the thermal benefits are the big benefit. While dry screed acts as an insulator (trapping heat), liquid screed acts as a conductor (spreading heat). This means your heating bills stay lower, and your rooms warm up 80% faster.
At-a-Glance – Wet Screed vs. Dry Screed Comparison
|
Feature |
Dry Screed (Sand & Cement) |
Wet Screed (Liquid/Flow) |
|
Installation Method |
Manual trowel & straight edge |
Precision pump-applied |
|
Self-Levelling? |
No – depends on manual skill |
Yes – naturally finds its own level |
|
Ideal Thickness |
65mm – 75mm |
35mm – 50mm (as low as 12mm) |
|
Drying Time |
Walkable in 24-48 hours. 1mm per day (the depth required means it can take weeks) |
Walkable in 24-48 hours. 1mm per day (thinner layers means faster drying) |
|
Heat Efficiency |
Moderate (contains air pockets) |
Superior (full pipe encapsulation) |
|
Best Used For |
Wet room slopes & small repairs |
UFH, extensions & large floor areas |
|
Risk of Cracking |
Higher (due to shrinkage) |
Minimal (highly stable) |
From Preparation to Pour – How Screed is Installed
The success of your screed floor depends entirely on the preparation. Below is the process required for each of the screeds. Installing dry screed is a manual process whereas wet screed is pumped into place, preferably by professional screeders.

1. The Dry Screed Process:
- Substrate Prep – Clear the structural slab of all dust and debris and apply a bonding agent or damp-proof membrane.
- The Mix – Create a ‘semi-dry’ 4:1 ratio of sand and cement, taking care that it has just enough moisture to bind.
- Setting the Levels – Set ‘battens’ or ‘screed rails’ across the room to act as height guides.
- The Spread – Shovel the mix into the space and use a straight-edge timber to ‘rule off’ the excess.
- The Finish – Use a hand trowel or power float to smooth the surface. It’s walkable in 24-48 hours.
2. The Liquid Screed Process:
- The Tanking – The room is lined with a polythene membrane and foam edging strips to create a ‘watertight’ unit with flexible edges.
- The Laser Level – We set tripod gauges across the floor, using high-precision lasers to find the exact finish height.
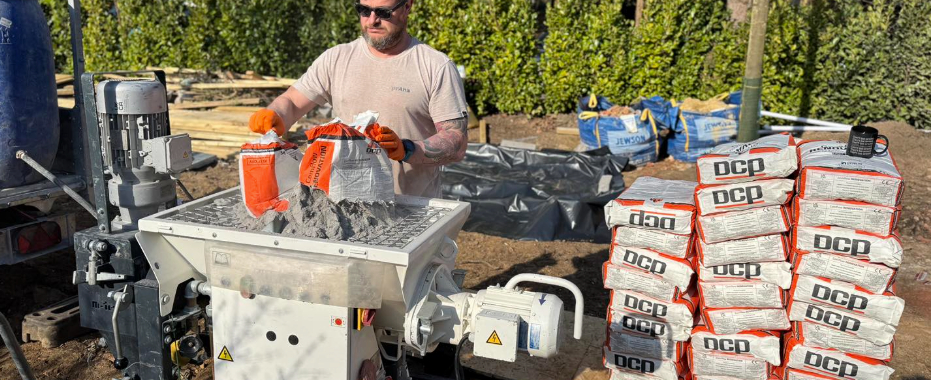
- The Pump – Our screeding team delivers the wet screed using a high-pressure pump, which filling the space fast.
- The Dapple – Our screeders use a ‘dapple bar’ in two directions to remove air bubbles and help the screed find its own level.
- The Curing – We leave the floor to settle – it’s walkable in 24–48 hours.
- The Sanding (Crucial Step) – After approximately 7–10 days, the surface will need to be sanded to remove laitance. This is a thin, weak layer that forms on top. It’s removal is necessary to ensure that your floor adhesive bonds perfectly to the strong screed underneath.
Your Screeding Questions Answered
By the time you’re considering which screed to use, you’ve most likely already made thousands of decisions for your project. To help you cross the finish line, we’ve answered the four most common questions our London and Essex clients ask during site visits.
Yes, but it needs specific prep. We’d recommend installing a floating floor system with insulation and a reinforced membrane.
Usually, yes. If you’re building a wet room where the floor needs to slope toward a drain, dry sand and cement is the only way to go. Liquid screed is ‘self-levelling,’ so it will always try to be perfectly flat—which is the last thing you want in a shower!
Don’t guess. Use a digital hygrometer or a ‘carbide bomb’ test to measure the moisture deep in the slab. Wood is very sensitive; if the screed is even slightly damp, your floorboards will warp.
No. It’s a low-VOC (Volatile Organic Compound) product. You may notice a slight “damp” smell for the first 24 hours as the water evaporates, but it’s completely non-toxic and safe for you to be around once it’s walkable.
Get the Best From Your Floor with Capital Screeding
Based in London and serving Essex and the entire South East, we specialise in high-performance liquid screed installations. If you want a faster, flatter, and more thermally efficient floor, you need a team that prioritises precision.
Call us today to discuss your site requirements and see why we are the trusted choice for builders, renovators, UFH installers and DIYers – 020 3369 3396